Making sense of HDD drilling fluid additives
Drilling fluid, or mud, is an essential part of the horizontal directional drilling (HDD) process. It involves learning how to properly mix drilling fluids and calculating how much drilling fluid you need on a job to determine what type of drilling additives you should be using.
In case you missed it, part one of this series, “Making sense of HDD drilling fluids” covered why drilling fluid is essential to HDD and the mixing process, and part two explained how to calculate reamer pullback drill rates.
In part three of three, you will learn how to determine which drilling fluid additives you should use, based on soil type.
Overview for deciding which additive to use
To begin, identify what type of soil conditions you will be drilling in. The conditions will help you determine what type of additives you need. For example, in non-reactive clay, you will likely need a mixture of bentonite, which helps produce needed cutting carrying capacity to flush the bore hole, and a lubricant to keep soil from sticking and bit balling to your tooling. However, when you’re working in reactive clay, sand or cobble, you may need a polymer additive.
There are several types of polymer additives to choose from, each engineered to help you deal with specific soil conditions. PAC polymers are typically added to a bentonite mixture to help provide secondary filtration control (sands and cobbles). In formations with high concentrations of reactive clays, PHPA polymers are used in place of bentonite. PHPA polymers help prevent clay from swelling by wrapping itself around the clay. A larger molecular weighted polymer is a good match for cobble and rocky conditions because it acts as a suspension aid and helps create a stable bore path and assists with extracting larger cuttings from the bore path.
Use this chart to help you determine which drilling additives you should use in various soil types.
General drilling fluid products and function
| Non-reactive clay | |
|---|---|
| Bentonite | Primary filtration control (filter cake) |
| Soap/detergent | Keep tooling clean |
| Reactive clay | |
|---|---|
| Bentonite | Primary filtration control (filter cake) |
| PAC polymer | Secondary filtration control |
| PHPA polymer | Prevent clay swelling |
| Thinner (only if excessive viscosity) | Thin out viscosity from polymer |
| Soap/detergent | Keep tooling clean |
| Sand | |
|---|---|
| Bentonite | Primary filtration control (filter cake) |
| PAC polymer | Secondary filtration control |
| Larger molecular weight polymer | Suspension aid polymer |
| Cobble | |
|---|---|
| Bentonite | Primary filtration control (filter cake) |
| PAC polymer | Secondary filtration control |
| Larger molecular weight polymer | Suspension aid polymer |
| Rock | |
|---|---|
| Bentonite | Primary filtration control (filter cake) |
| Larger molecular weight polymer | Suspension aid polymer |
| Fracture rock | |
|---|---|
| Bentonite | Primary filtration control (cake filter) |
| PAC polymer | Secondary filtration control |
| Larger molecular weight polymer | Suspension aid polymer |
Mixing it all together
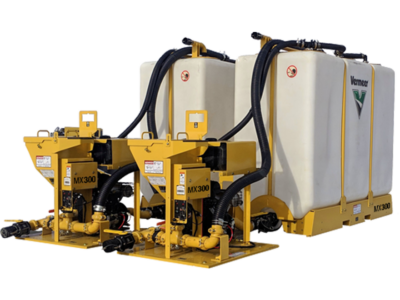
Always follow your mix system operating instructions, typically start with bentonite and be sure you’re sending it through the venturi and hopper at full throttle. You want to get the maximum implosion the first time through the venturi to mix the product well. After enough bags of bentonite are mixed through, continue mixing for approximately 10 more minutes until it’s thoroughly broken up and hydrated.
If you plan to add a polymer, you need to wait until the bentonite is entirely mixed, usually about 10 minutes. Adding a polymer too soon or out of sequence could cause the bentonite to ball up in the tank, rendering it ineffective. Always add a PAC polymer before a PHPA and dry polymers before liquid polymers.
For more tips on mixing, revisit part one, of this series, or part two to determine how much fluid you need.
Where to find help
If you’re not sure about the soil conditions you’re going to be working in or if you have questions about which mixing additives you should be using, talk to your local Vermeer dealer. They can help you determine what other contractors are using in the area. Also, be sure to follow the directions on the side of the additive bag or container to determine the correct amounts.
Vermeer Corporation reserves the right to make changes in product engineering, design and specifications; add improvements; or discontinue manufacturing or distribution at any time without notice or obligation. Equipment shown is for illustrative purposes only and may display optional accessories or components specific to their global region. Please contact your local Vermeer dealer for more information on machine specifications.
Vermeer, the Vermeer logo, Armor, Maul, Lance, Gauntlet and Navigator are trademarks of Vermeer Manufacturing Company in the U.S. and/or other countries.
© 2019 Vermeer Corporation. All Rights Reserved.

