Inspecting and maintaining equipment on horizontal directional drilling (HDD) projects is crucial. However, it’s not only the equipment that requires attention. The HDD tooling used downhole also needs regular inspections, service and when necessary, replacement.
Factors impacting the lifespan of HDD tooling
HDD tooling has no fixed service or replacement intervals. The lifespan of tooling can vary significantly due to factors such as ground conditions, operator experience, steering requirements and drilling fluid practices.
According to Cody Mecham, Vermeer Cutting Edge product manager, contractors generally understand that rocky grounds can be harsh on HDD tooling components. However, in certain cases, abrasive materials like sand can have an equal, if not greater, impact on tooling lifespan.
“Sandy loam provides a highly workable and ideal drilling environment. However, if the drill path is not properly lubricated with the right drilling fluid mixture, HDD tooling can wear out prematurely,” Mecham explained. “Crews should still use drilling fluids during bores, even in optimal ground conditions. Without it, there is a risk of premature wear to bits, reamers, housing and drill rods.”
In addition to ground conditions, the operator sitting in the seat of the drill and the bore steering requirements can also impact the life of HDD tooling. Oversteering or attempting to bore faster than ground conditions allow can shorten the lifespan of HDD tooling.
HDD tooling inspection process
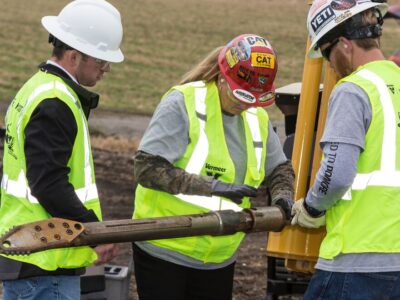
To ensure the condition of the HDD tooling downhole, it is crucial to inspect each piece attached to the drill string before and after a pass.
Mecham’s advice: Always apply grease to threaded connections when adding new tooling. Regularly inspect the condition of these threads using a thread gauge.
In addition to regular visual inspections, operators should remain vigilant about changes during a bore that may indicate tooling-related issues. Loss of steerability or changes in rotational torque pressures could be signs of worn tooling.
Typical signs of wear include thinning, cracking, missing tool components and a loss in boring productivity. In some cases, HDD tooling can be serviced or rebuilt. Even so, all HDD tooling needs to be replaced at some point.
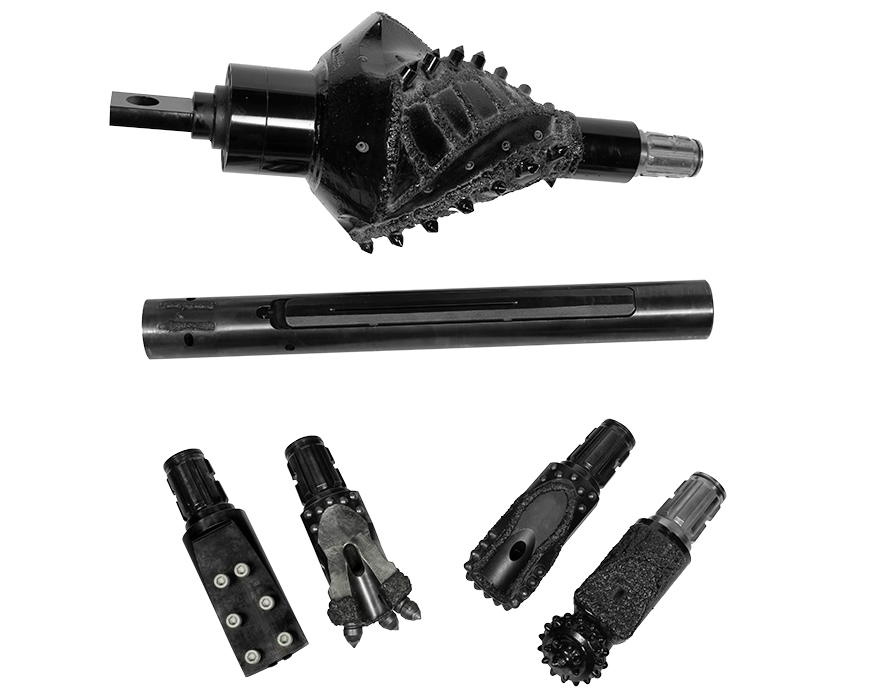
Here is an overview of the inspection process for common HDD tooling found at the end of a drill string.
Starter rod inspection
When examining starter rods, it is important to check for signs of wear on the collar. A worn collar can make it difficult to handle torque and may eventually lead to breakage. Keep an eye on the section behind the collar for any accumulation of debris over time. It can cause the rod body to narrow, resulting in a phenomenon referred to as hourglassing. If you notice significant hourglassing, consider replacing the starter rod.
Also, pay attention to the loosening required for proper alignment of the starter rod. This involves tightening the rod and gradually loosening it until two flat sides align, allowing the collar to slide smoothly. If there is a gap of more than 1/16 in (1.6 mm) in the connection when aligning the collar, it can cause similar issues as an under-torqued rod, resulting in excessive flexing and eventual cracking of the starter rod. If there is a gap, you should replace the starter rod.
Transmitter housing inspection
When inspecting the transmitter housing, check the fluid ports to ensure proper functioning. Verify that the lid and bolts are in good condition. Measure the outside diameter (OD) to determine the amount of wear since it was new. If the transmitter housing has worn off by 1/8 in (3.2 mm) or more, it is likely approaching the end of its life.
Another important step is to inspect the threads on the backend and replace the spud if necessary. Over time, the spud can break off as the equipment ages.
It is also crucial to examine the inside of the sonde compartment for cracking or signs of damage. Cracks can propagate and cause issues over time, potentially leading to breakage.
The only components that can be replaced for the transmitter housing are the hardware, lid, water nozzles and on many models, the spud adaptor.
Replace any housing that shows signs of cracking, lost hardfacing or an outside diameter worn beyond the specified limit.
Mecham’s advice: Vermeer recommends not adding hardfacing to the transmitter housing. Additional heat could compromise the integrity of the housing.
Drill bit inspection
To inspect an HDD drill bit, carefully examine its integrity, shape, carbide assets, diameter and the condition of the bit bolts. Begin by checking for any cracks or visible damage on the bit, making sure there are no flaws that could weaken it. Assess the shape of the bit to confirm it is not losing its form or wearing out, as this can affect steering and drilling efficiency. Take note of any wash around the carbide assets and make sure that the wear is not significant enough to risk dropping a button into the hole, as this can impact drilling performance. Verify that the bit has enough material to cut at the required diameter, as a significantly worn-down diameter may hinder steering capabilities. Lastly, inspect the torque of the bit bolts, making sure they are fresh and tight to maintain the reliability of the drill string.
Replace a drill bit when it has significantly worn down, causing the carbide buttons to no longer resemble buttons but instead look like fingers. Additionally, if you observe cracks propagating on the drill bit, it is time for replacement.
Reamer inspection
With reamers, it is important to check the condition of the threads. If the threads are damaged, remove the spud and replace it with a new one in the adapter. It is crucial to confirm that the cutters, whether shark or rotary cutters, are in good shape and that the reamer has sufficient hardfacing.
On many reamers, hardfacing can be added. Also, you can cut off the old cutters on Vermeer fluted and T-Rex reamers and weld new ones on.
The end of life for a reamer occurs when the body’s integrity has been compromised. For example, if the teeth have completely worn off after extensive use or the casting has significantly worn down, it is time to retire the tool.
Mecham’s advice: Remember to maintain a built-up hardface and keep the cutters in good condition. Make sure they are flushed and that the ports are clear and undamaged. This is the essence of maintaining the reamer’s functionality.
Swivel inspection
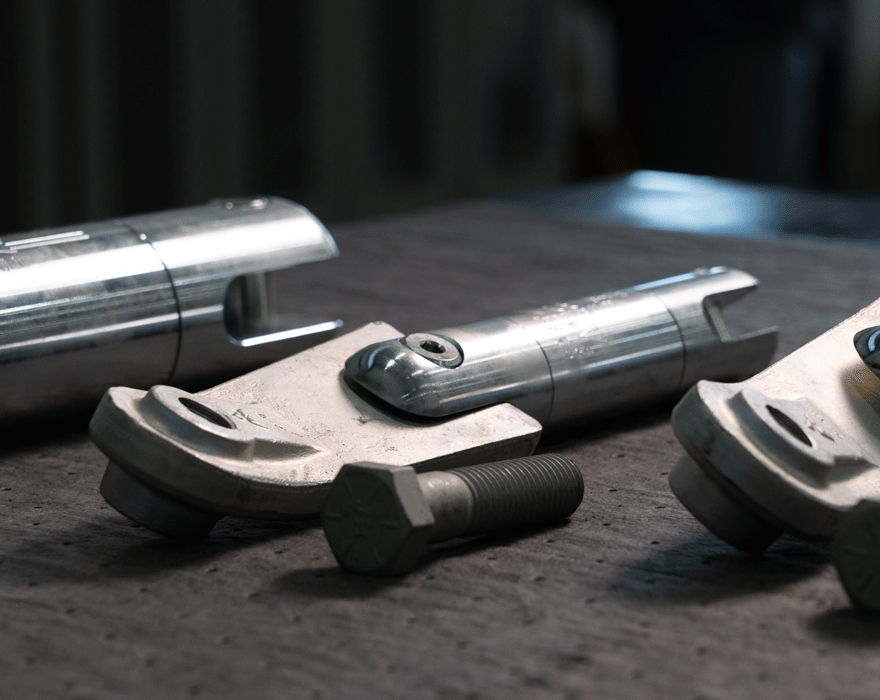
A failure of a swivel downhole can impact the project’s success. When inspecting swivels, look for cracks or abnormal wear. It is also important to confirm that the hardware, such as bolts and pins, is in good condition and regularly lubricated.
While many swivels, including bullet and the Vermeer Quickshot swivel assembly, are not rebuildable, others allow operators to replace bearings, seals and other components, except for the casing.
Excessive abrasive wear indicates that it is time to retire the swivel.
Mecham’s advice: If the swivels you use have grease points, remember to grease them every time you finish using them instead of greasing them before the next use. Swivels generate heat while in use, which can attract debris when they cool down after being removed from the hole.

HDD puller inspection
Conduct a thorough visual inspection of the pullers, checking for cracks, gouges or excessive wear. The specific requirements may vary depending on the type of puller being used. For pull-grip-style pullers, make sure all braids are intact, the ends are securely attached and there is no fraying. If using a carrot puller or an expanding-taper puller, verify that the jaws are clean, in good condition and sharp.
Carrot pullers cannot be rebuilt, but other expandable pullers can. You may be able to replace the jaws when they become dull. Additionally, you can replace the O-rings inside them as they wear out.
Mecham’s advice: When in doubt, it’s better to replace pullers with a new one before pulling back.
Inspecting HDD tooling is crucial for maintaining efficient and successful bore operations. For additional HDD tooling support, contact your local Vermeer dealer HDD specialists. You can also visit borestore.com to learn more about Vermeer HDD tooling options for your horizontal directional drills.
For more information on inspecting HDD sub savers and drill rods, check out these articles:
- Essential tips to know for drill rod upkeep and maintenance
- Directional drill sub saver maintenance and replacement tips
Vermeer Corporation reserves the right to make changes in engineering, design and specifications; add improvements; or discontinue manufacturing at any time without notice or obligation. Equipment shown is for illustrative purposes only and may display optional accessories or components specific to their global region. Please contact your local Vermeer dealer for more information on machine specifications.
Vermeer, the Vermeer logo and Borestore are trademarks of Vermeer Manufacturing Company in the U.S. and/or other countries. © 2024 Vermeer Corporation. All Rights Reserved.

